Published by Sagar Kudu on
- 2 min read
Turn GitHub Repository into Interactive Diagrams
Convert a GitHub Repository into a Diagram
Easily visualize your GitHub repository using interactive diagrams by following the steps below.
🧭 Step-by-Step Guide
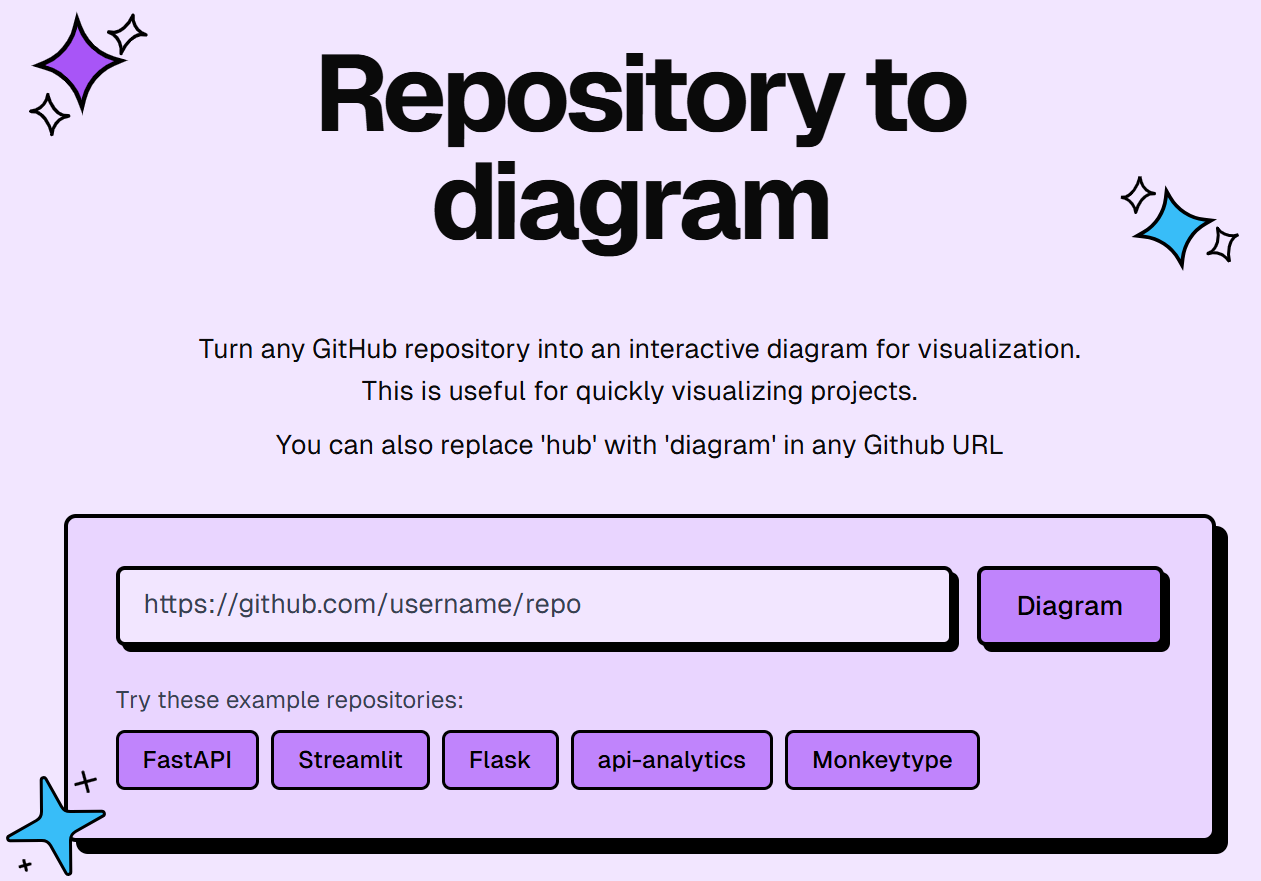
✅ Step 1: Visit the Website
Start by visiting the main interface where the diagram generation begins.
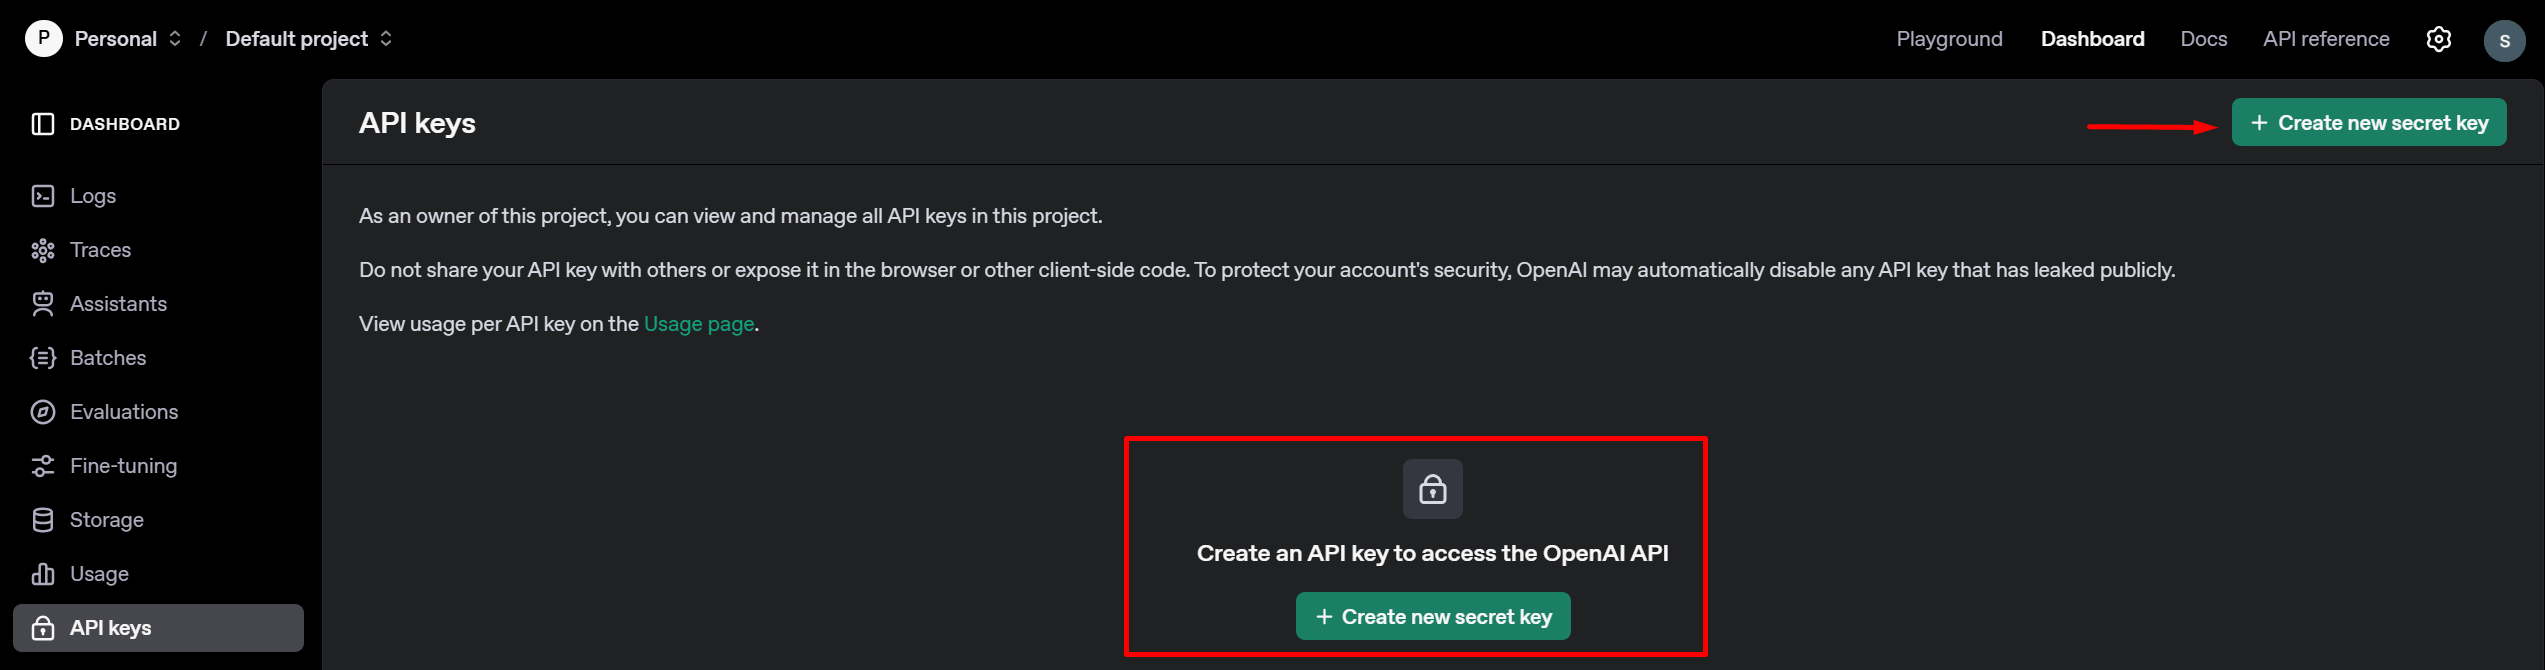
🔑 Step 2: Get Your OpenAI API Key
To generate diagrams, you’ll need an OpenAI API key.
- Sign Up or Log In to OpenAI
- After logging in, go to the API Keys Dashboard
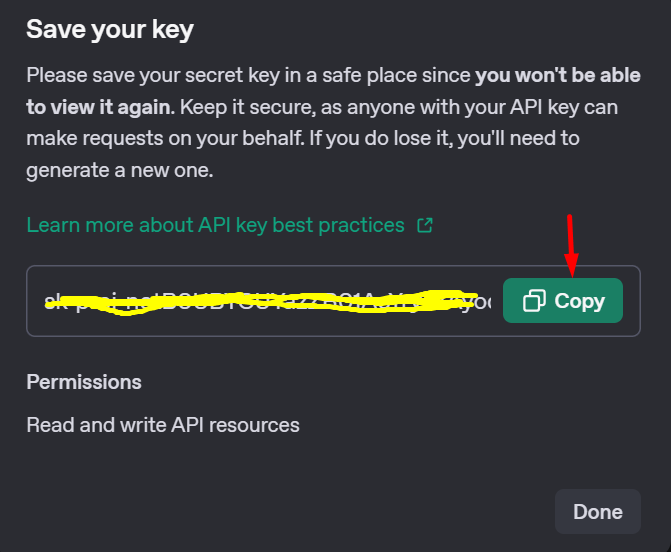
🛠️ Step 3: Generate a Secret Key
Click on “Create new secret key” to generate your API key.
📝 Step 4: Name Your Project
Give your API key a clear name, such as “GitHub Diagram”, for easy identification.
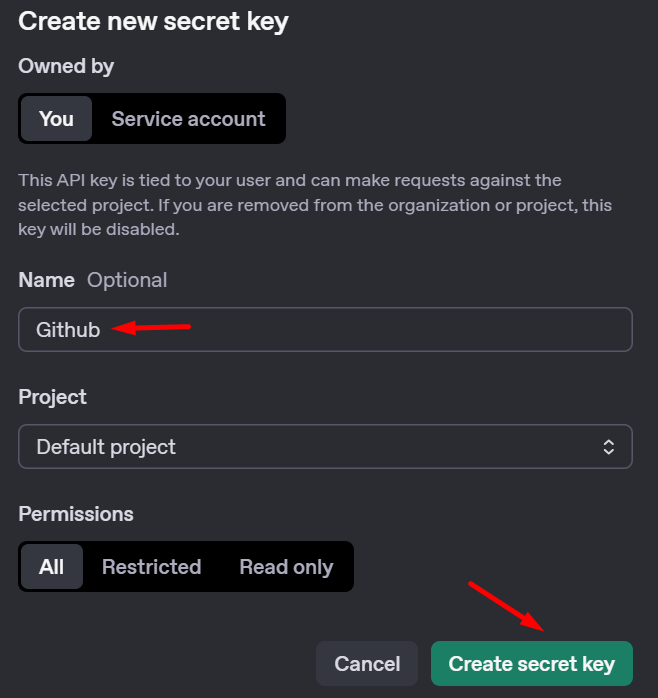
💾 Step 5: Save Your Key
Copy the generated key and store it somewhere safe — it will only be shown once.
💡 Tip: Use a secure text editor like Notepad++ or a password manager to store your key.
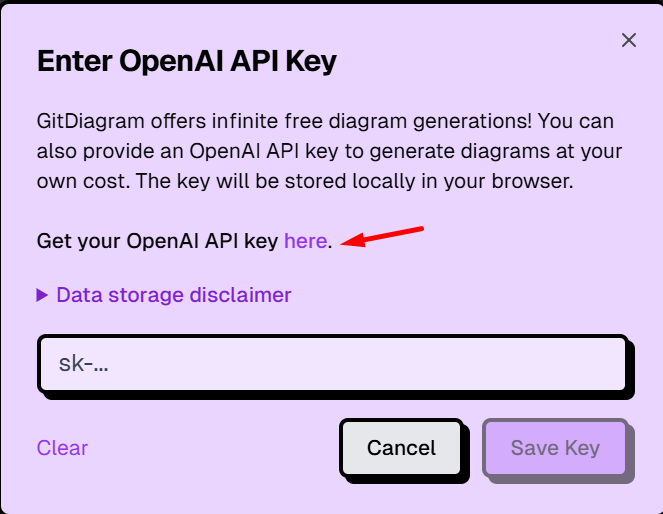
🎉 Final Step: Use the Key on GitDiagrams
Once your key is saved, you’re ready to use it on GitDiagrams.com!
- Go to the homepage.
- Click on the API Key button.
- Paste your secret key.
- Click Save Key.
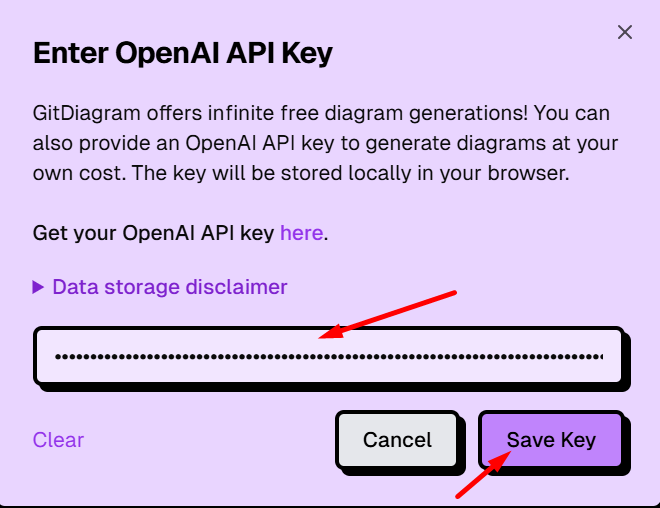
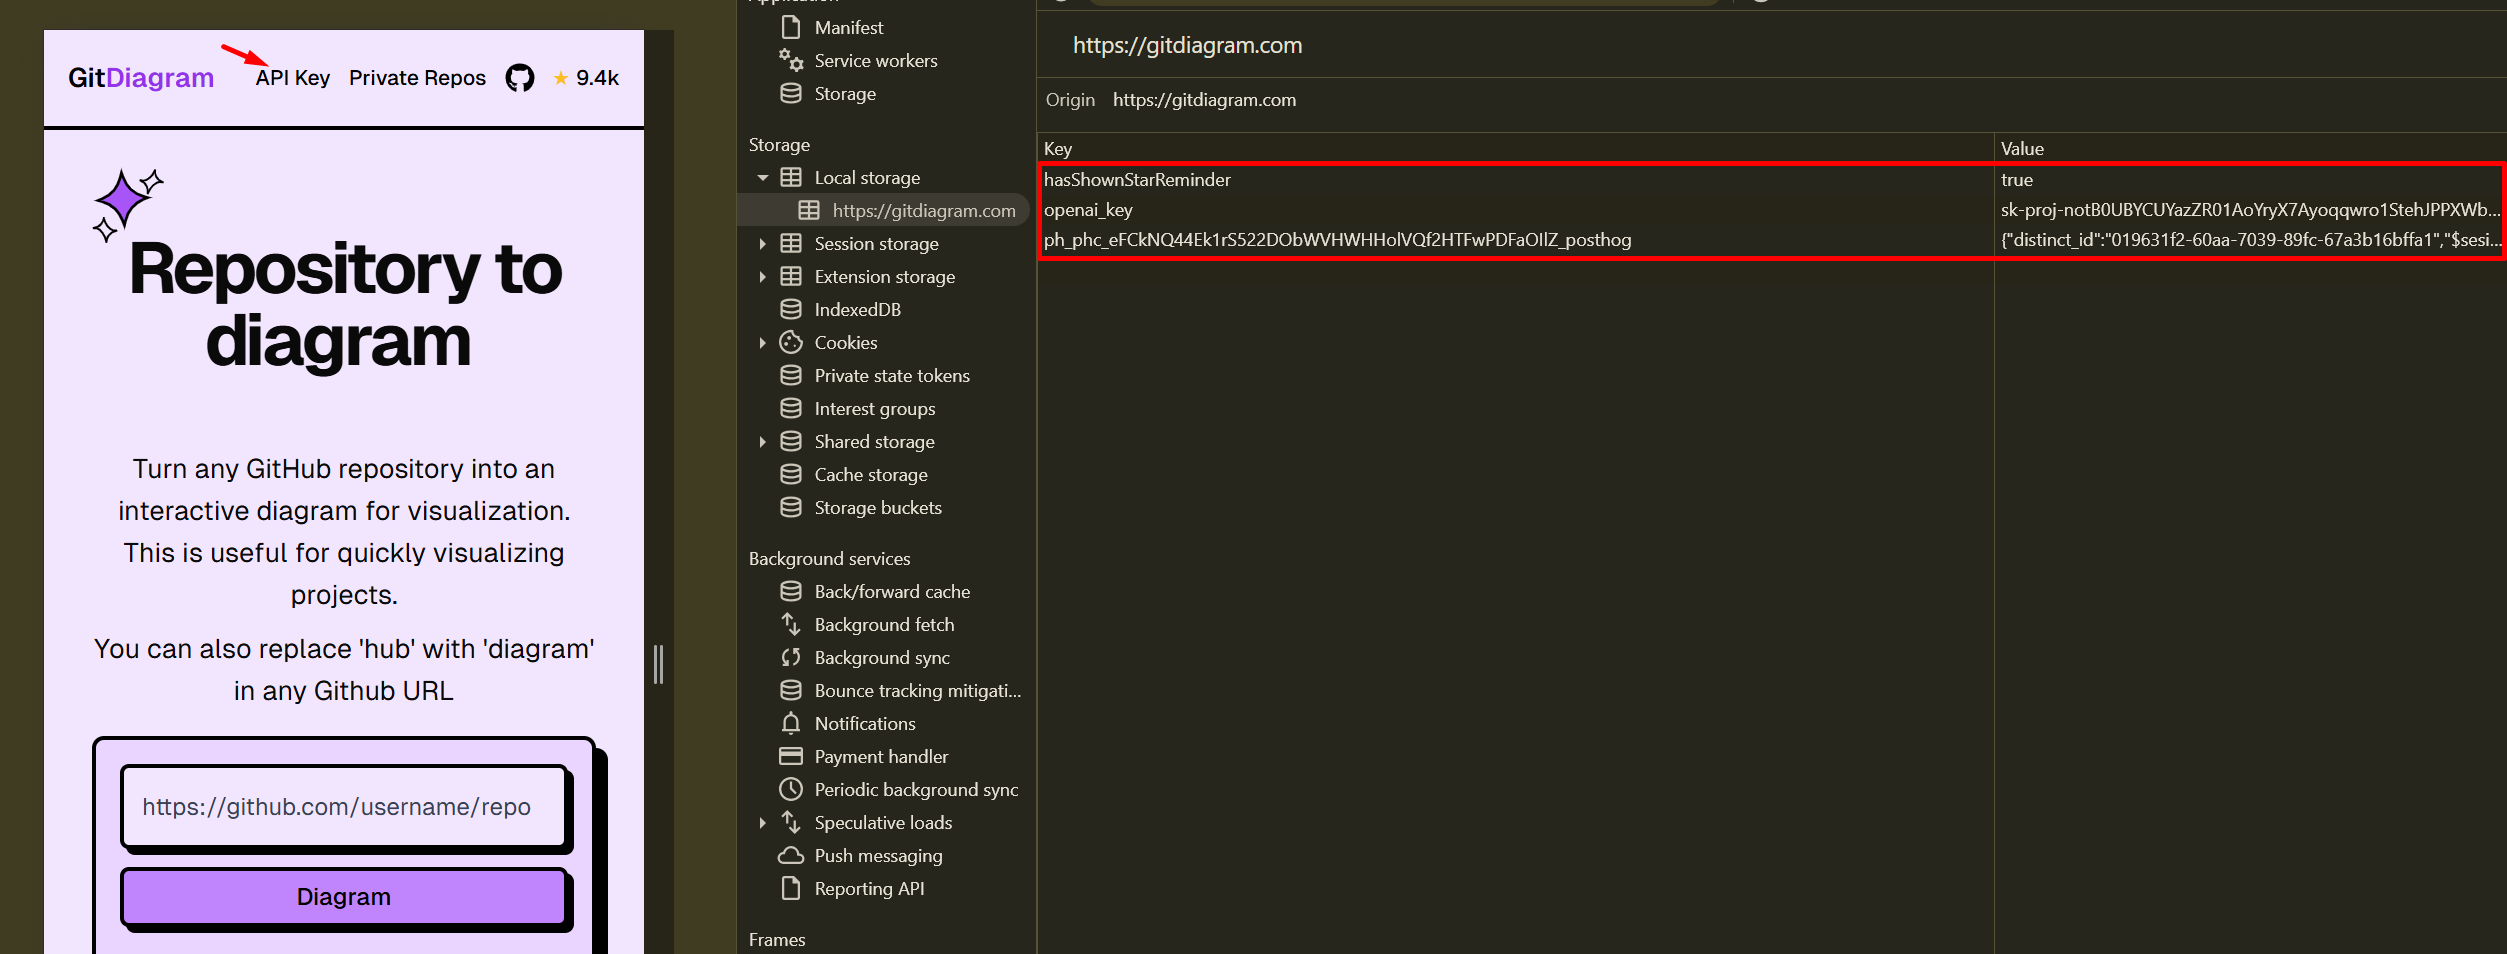
Your key is stored locally in your browser’s localStorage.
Here’s a reference image showing how it’s stored:
🔗 Visualize Your GitHub Repo
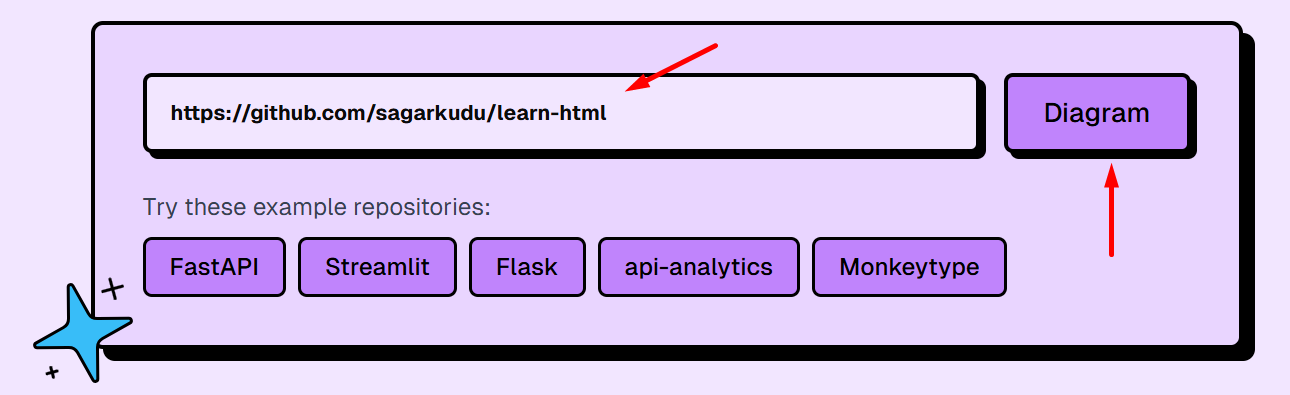
- Visit GitHub.com and navigate to your repository.
- Copy the repository URL.
Example:https://github.com/sagarkudu/learn-html - Paste the URL into GitDiagrams and click “Diagram” to generate your visual.
⚠️ Lost Your Key?
If you lose your API key, simply repeat the steps above to generate a new one.
💬 Need help? Drop a comment or reach out to support for assistance!